Android Setup
This guide describes basic steps of the Android development environment setup that are required to run React Native android apps on an android emulator. We don't discuss developer tool configuration such as IDEs here.
Install Git #
On Mac, if you have installed XCode, Git is already installed, otherwise run the following:
brew install gitOn Linux, install Git via your package manager.
On Windows, download and install Git for Windows. During the setup process, choose "Run Git from Windows Command Prompt", which will add Git to your
PATHenvironment variable.
Install the Android SDK (unless you have it) #
- Install the latest JDK
- Install the Android SDK:
- On Mac:
brew install android-sdk - On Linux and Windows: Download from the Android website
- On Mac:
Define the ANDROID_HOME environment variable #
IMPORTANT: Make sure the ANDROID_HOME environment variable points to your existing Android SDK:
On Mac, add this to your
~/.bashrc,~/.bash_profileor whatever your shell uses:# If you installed the SDK via Homebrew, otherwise ~/Library/Android/sdk export ANDROID_HOME=/usr/local/opt/android-sdkOn Linux, add this to your
~/.bashrc,~/.bash_profileor whatever your shell uses:export ANDROID_HOME=<path_where_you_unpacked_android_sdk>On Windows, go to
Control Panel->System and Security->System->Change settings->Advanced->Environment variables->New
NOTE: You need to restart the Command Prompt (Windows) / Terminal Emulator (Mac OS X, Linux) to apply the new Environment variables.
Use gradle daemon #
React Native Android use gradle as a build system. We recommend to enable gradle daemon functionality which may result in up to 50% improvement in incremental build times for changes in java code. Learn here how to enable it for your platform.
Configure your SDK #
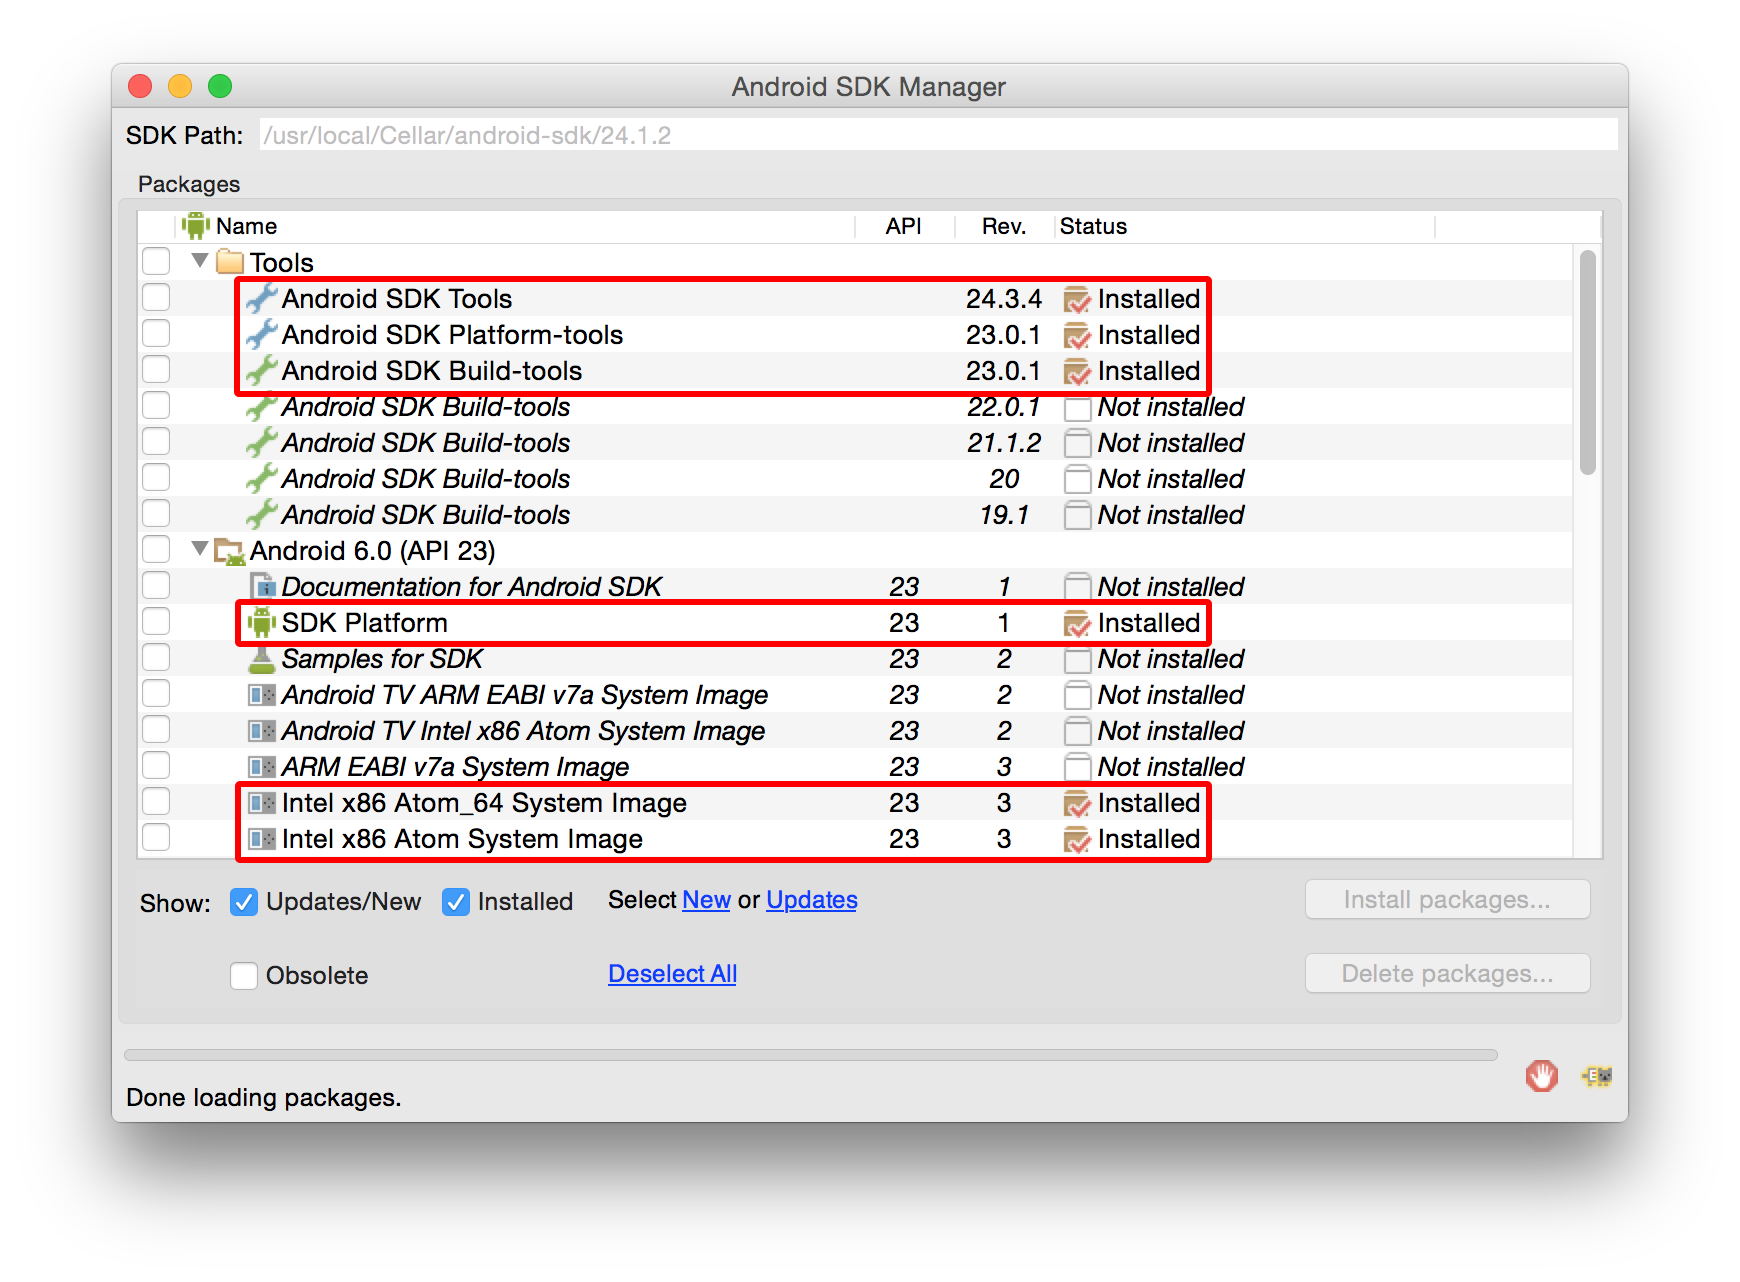
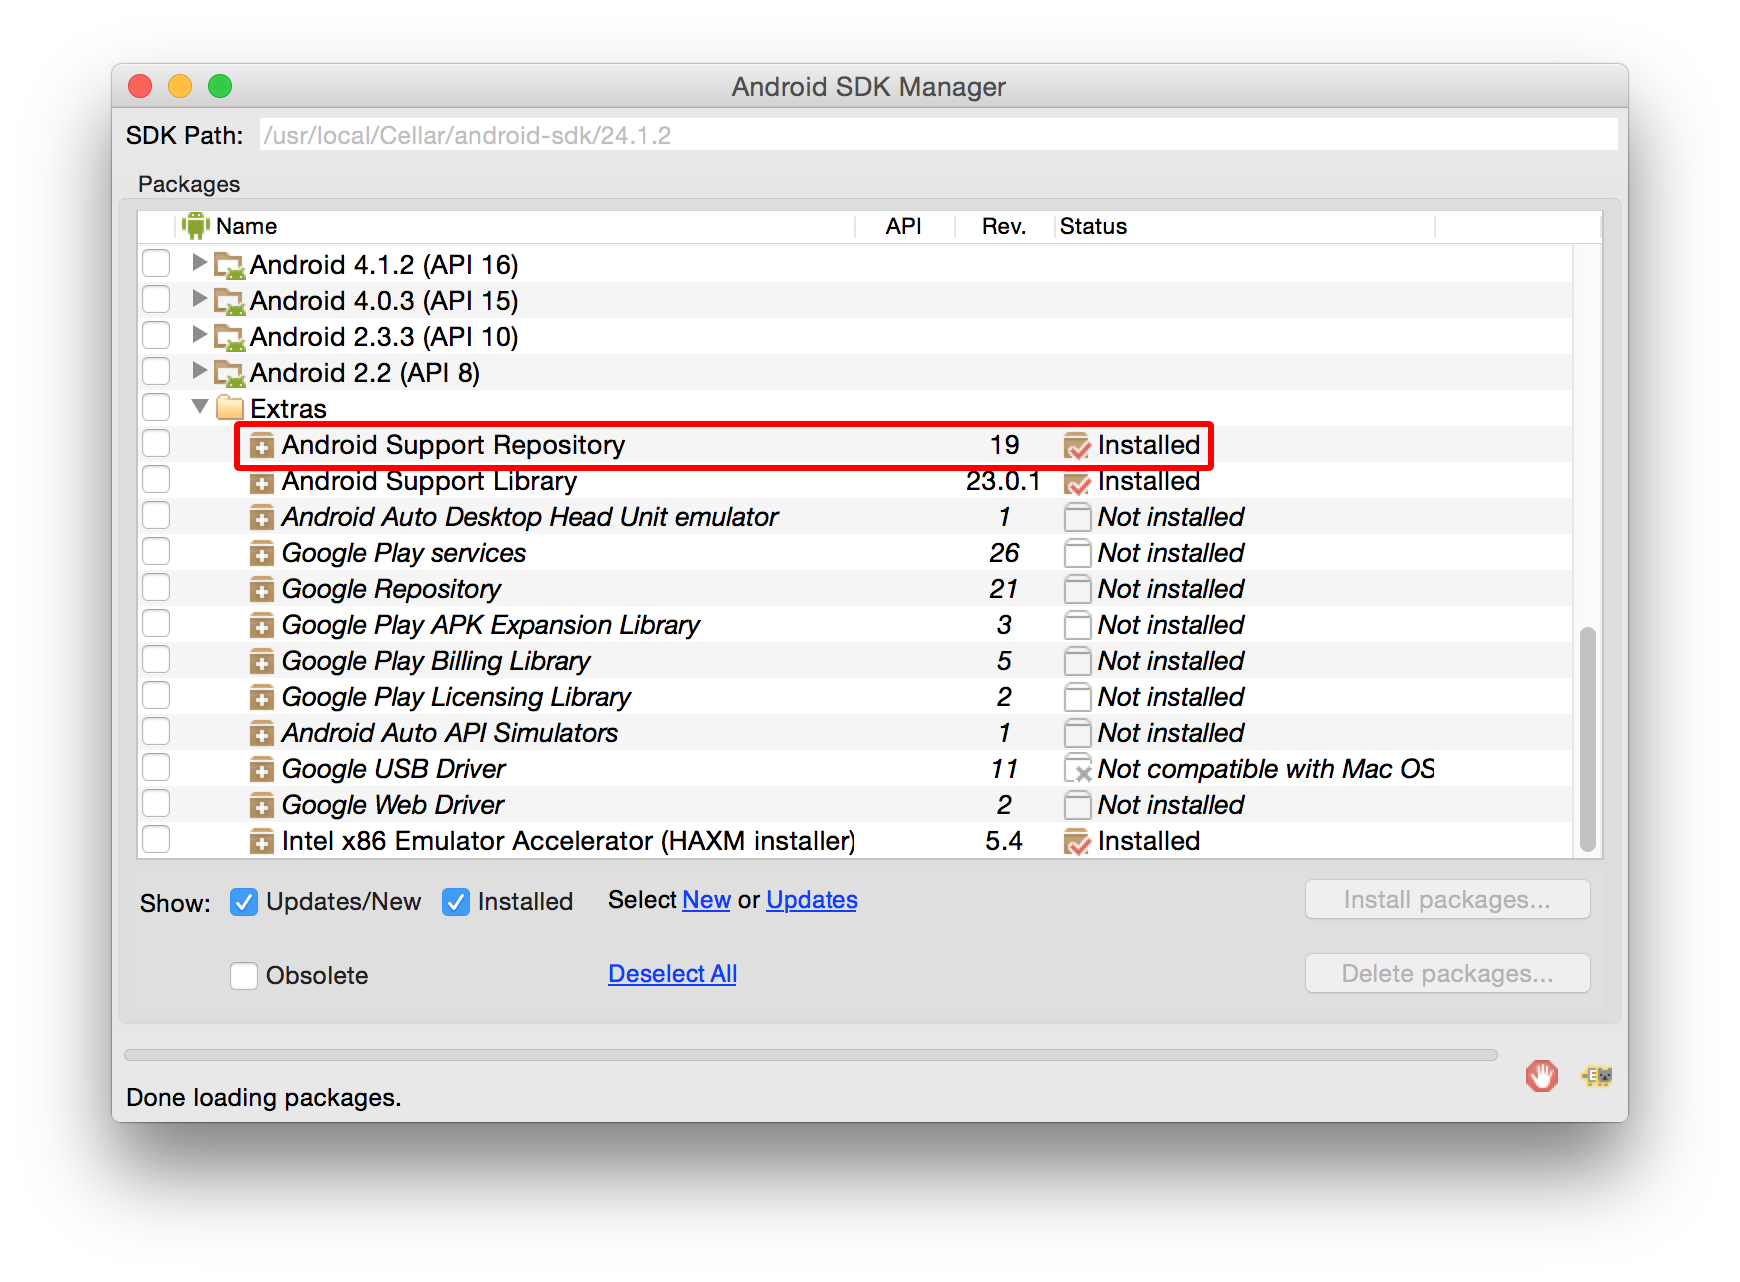
- Open the Android SDK Manager (on Mac start a new shell and run
android); in the window that appears make sure you check:- Android SDK Build-tools version 23.0.1
- Android 6.0 (API 23)
- Android Support Repository
- Click "Install Packages"
Install Genymotion #
Genymotion is much easier to set up than stock Google emulators. However, it's only free for personal use. If you want to use the stock Google emulator, see below.
- Download and install Genymotion.
- Open Genymotion. It might ask you to install VirtualBox unless you already have it.
- Create a new emulator and start it.
- To bring up the developer menu press ⌘+M
Alternative: Create a stock Google emulator #
- Start a new shell and run
android; in the window that appears make sure you check:- Intel x86 Atom System Image (for Android 5.1.1 - API 22)
- Intel x86 Emulator Accelerator (HAXM installer)
- Click "Install Packages".
- Configure hardware acceleration (HAXM), otherwise the emulator is going to be slow.
- Create an Android Virtual Device (AVD):
- Run
android avdand click on Create...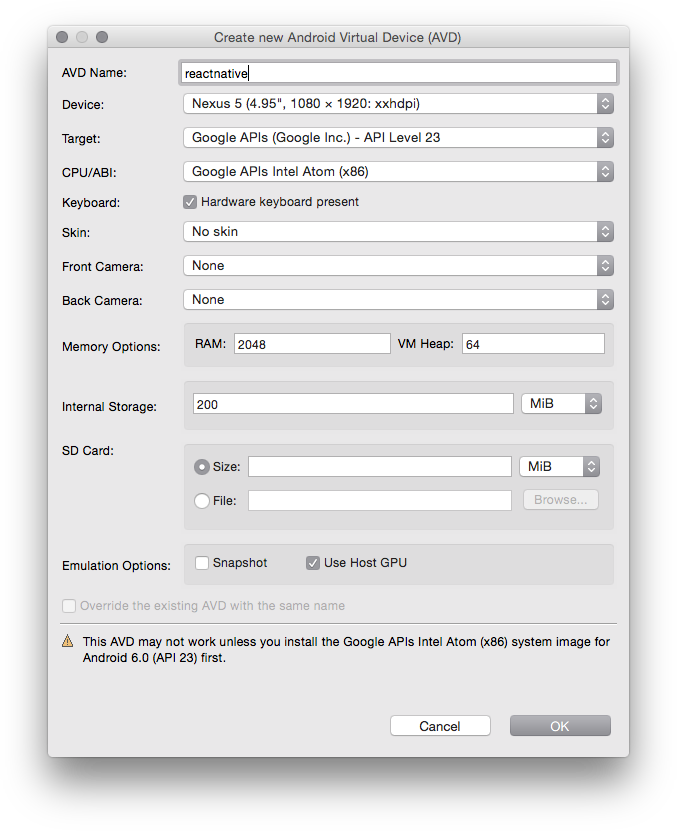
- With the new AVD selected, click
Start...
- Run
- To bring up the developer menu press F2